I’ve been living abroad for many years and have sent money overseas countless times to date. And those transactions combined has coasted me a fortune over time.
Better in every way
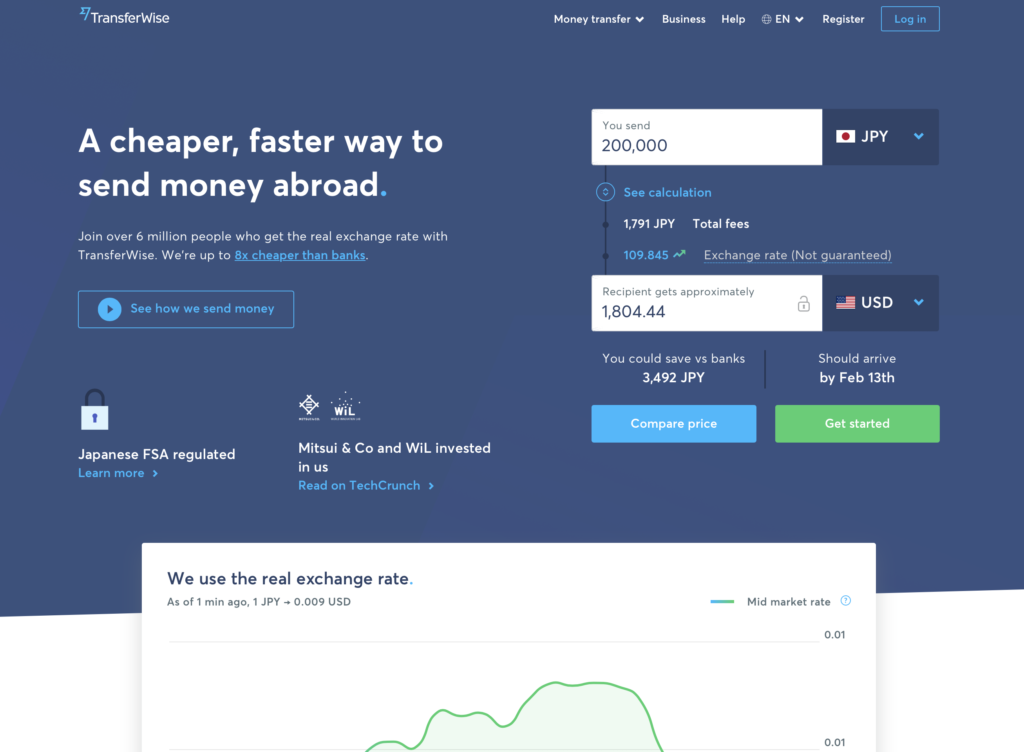
As you can see from the above screenshot, the homepage shows exactly how much it would cost to send X amount based off of the real-time exchange rate. And trust me, it’s not a marketing scam. This is exactly what you’re getting after you sign up and making transactions. I don’t recall anything quite clear and transparent like this when I sent money via online banking system. The transparency and ease of use is what I love most about this service.
I’ve been a user since early 2018 but I knew about it long before. When I first heard about it, it sounded too good to be true that I couldn’t help but feeling skeptical. I never felt secure with online banking so delegating a 3rd party service to handle my money took a lot of courage. What changed for me was when I knew that the company I work for uses the service to pay their overseas contractors. It gave me the confidence to finally go for it and since then, I just can’t go back to the traditional way and regret that I didn’t get to use it earlier.
Things I love about TransferWise:
- It’s cheap and the cost is transparent upfront
- The exchange rate is very close to what Google offers real time
- The rate can be guaranteed for 48 hours if you don’t refresh the page
- It’s fast, secure and reliable
- The interface is super user friendly (they’re taking tech seriously)
- They have a great customer support
How it works
They have bank accounts around the world. So when you send money from New Zealand to Japan, for example, once TransferWise receives the money in their New Zealand bank account, it will trigger their Japan account to transfer converted amount to recipient account in Japan. According to TransferWise, they don’t actually move the money across the border. Instead, they use their local entities around the world.
Let’s say you’re in A country and wish to send money to someone in B country. TransferWise has bank account in both A and B countries. This makes it possible for TransferWise to receive the money in A country from a sender and send to a recipient in B country from their own account in B country without the money crossing the border.
So…where do I start?
Just like any other great online services, creating TransferWise account is very easy. You can sign up with my invite link here which will give you a free first international transfer of up to $900.
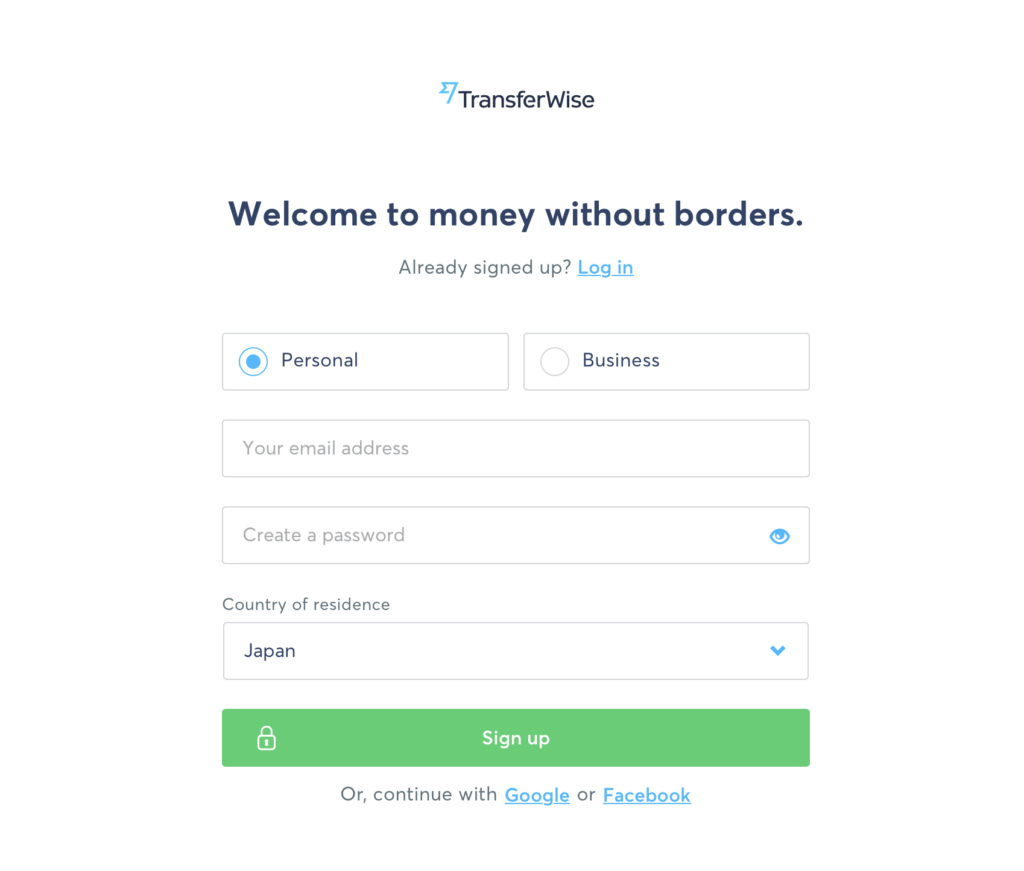
After the initial signup process is done, depending on where you are using the service from, you might be asked to verify your identity before making any transactions.
Please refer to their official page to learn more about verification process.
How to send money
Sending money is very easy in 5 simple steps. Pressing ‘Send money’ button in your dashboard will take you to this screen below.
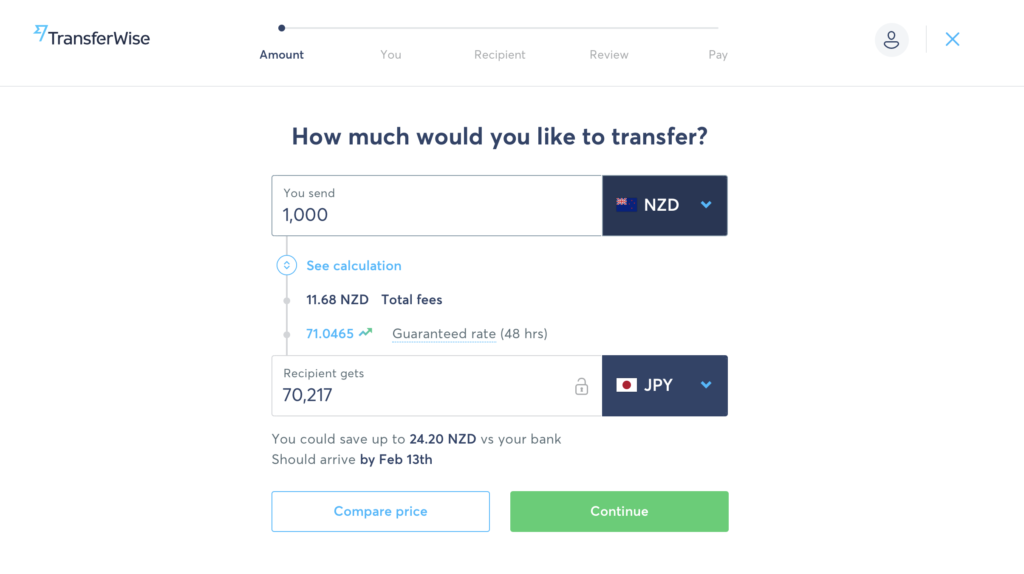
Looks familiar, right? It’s exactly what you saw from their homepage. And that’s why I said it’s not a marketing trick.
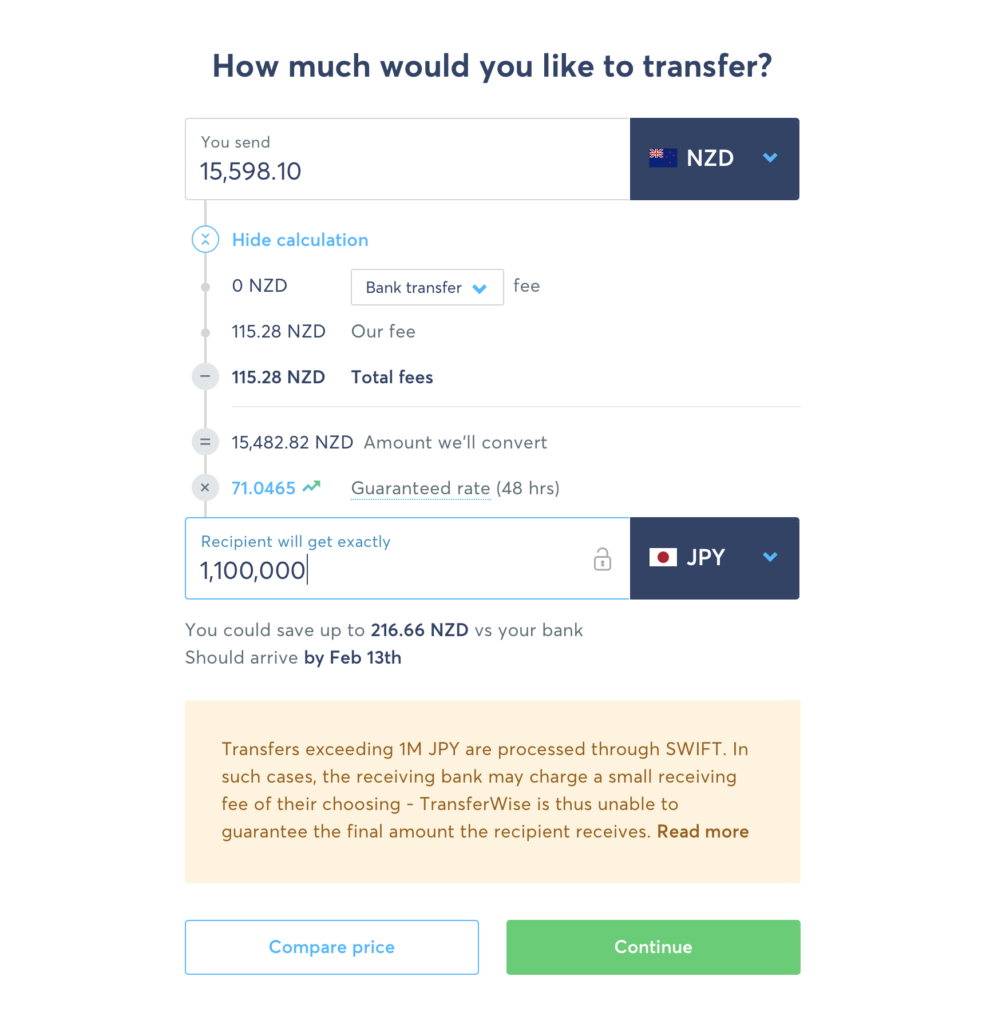
You basically enter amount that your recipient will get in ‘Recipient gets’ field, and the amount in ‘You send’ field will automatically be calculated with the included transaction fee based on the real-time exchange rate. You will notice the transaction fee increases as you increase the money you send. It also gives you a timeframe before proceeding to the next step. I hope you can see what I meant earlier by saying “super user friendly”. This is really all you want to know when sending money!
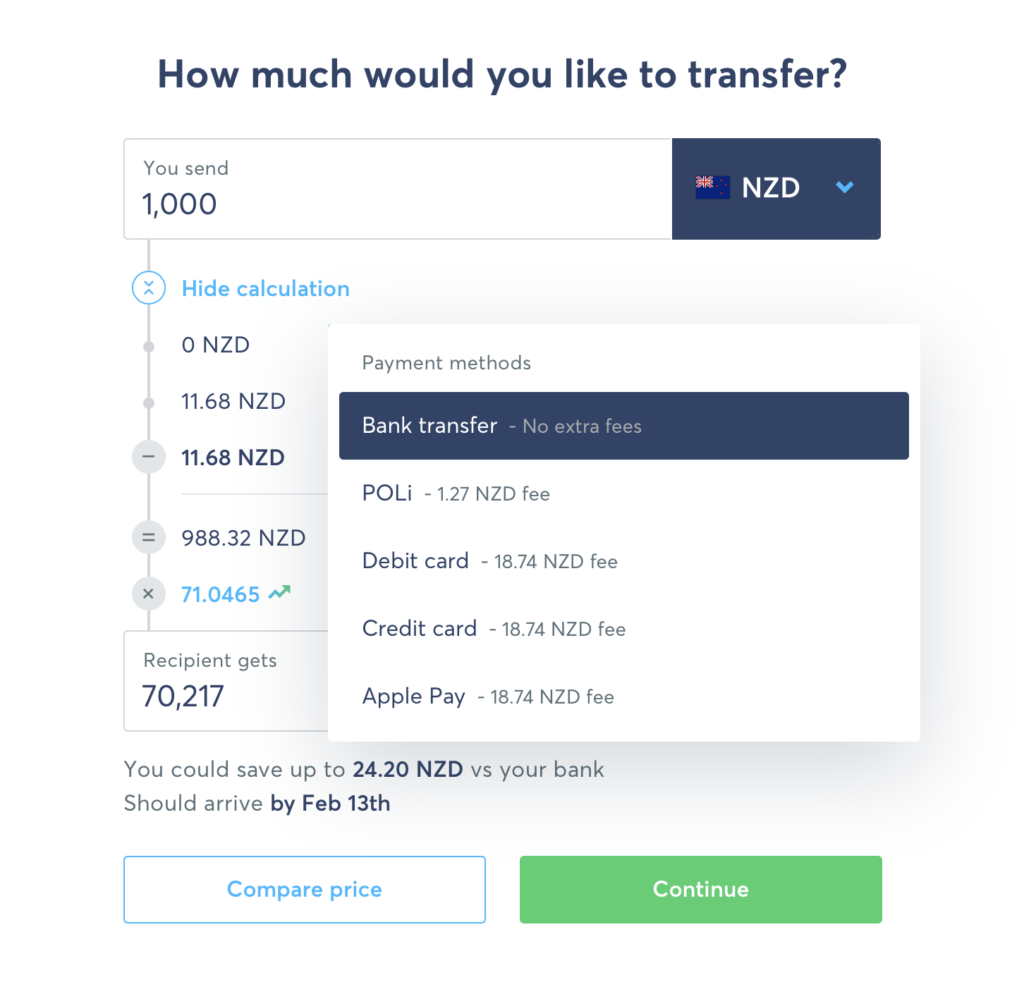
In this first step screen, you can choose a payment option which is for making payment in the last step. All the options come with clearly labelled fee making it easy to decide. I often choose Bank transfer option as I simply want to minimize the cost.
When I try to send more than 1 million yen which is about $15600 NZD, it gives me a warning that the fee might vary in the end. It also indicates that the transfer will need to be processed differently than when sending smaller amount. For this reason, I try to avoid sending large amount in one transaction. Instead, I break into multiple transactions with smaller amount. If you have to transfer a huge amount, maybe it would be wise to consult your bank directly.
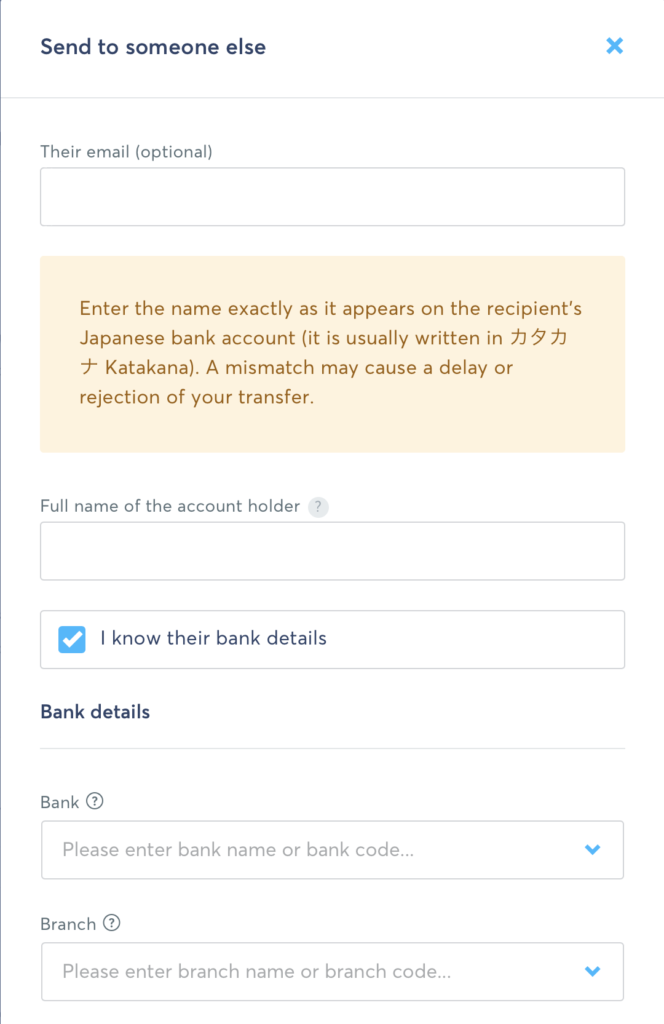
Now that you’re onto the next step, you will need to choose a recipient. You could be sending money to yourself or some one else but If it’s your first time you won’t have any saved list so you will need to add a recipient manually.
Things to watch for
There is a warning message in the following screen. It tells you to enter the recipient’s name as it appears on the recipient’s Japanese bank account (Highly likely in Katakana, a Japanese character). If you enter this field in English, in this instance, the transaction will fail.
I know it will fail because my sister-in-law recently opened her TransferWise account and sent money from New Zealand to Japan and she failed her first attempt by doing just that. She entered the recipient name in English while the recipient’s bank account name must be entered in Katakana. Thankfully, the money came back to her NZ account (such a relief to know that money doesn’t get lost if something goes wrong). After we found what went wrong, she tried again with the correct recipient detail and this time the transfer went successfully.
This only applies to Japanese account so simply ignore if you’re not sending money to Japan. The point though is that you will need to pay attention to this type of messages. Nonetheless, I’d suggest to try with small amount in your first attempt and see it cleared from the recipient before sending any larger amount.
One other thing that adds to the user friendliness is that you don’t need to know the bank’s SWIFT and branch code as it searches for you as you spell out their names. Pretty handy, right?
Once you’ve filled out all the recipient details, you will be on the Review page. Here you can choose to notify the recipient by email to inform that the money is on its way. If you’re happy with all the details you entered, simply proceed to the last step where you need to make a payment.
Since the majority of this screen will show my personal information, I will try to cover this step with only words. The payment instructions will show transaction reference detail and TransferWise bank account number where you deposit the money to. If you choose payment method other than ‘Bank transfer’, you can pay right on the same page but since I chose ‘Bank transfer’, I will have to go to my online banking and make the payment as per the instructions. Once I finish my bank transfer, I will come back to the TransferWise screen and notify that I’ve made the bank transfer. That’s all you need to do and you now leave the rest to TransferWise. Easy, right?
Wrapping up…
In certain countries, they offer an additional service called ‘Borderless Account’. Since it’s not available where I live, I don’t have personal experience with it but it sounds like a dream come true as you can send money overseas for free if you’re in a service region.
I really can’t think of a better way to send money overseas than through TransferWise and I would recommend it to anyone in a heartbeat!
Sign up with my invite link here and get a free first international transfer of up to $900.


Leave a Reply